
Event creation basics
You can create an event from the management menu after signing in. Events start as drafts, and once published, participants can view and register for them.
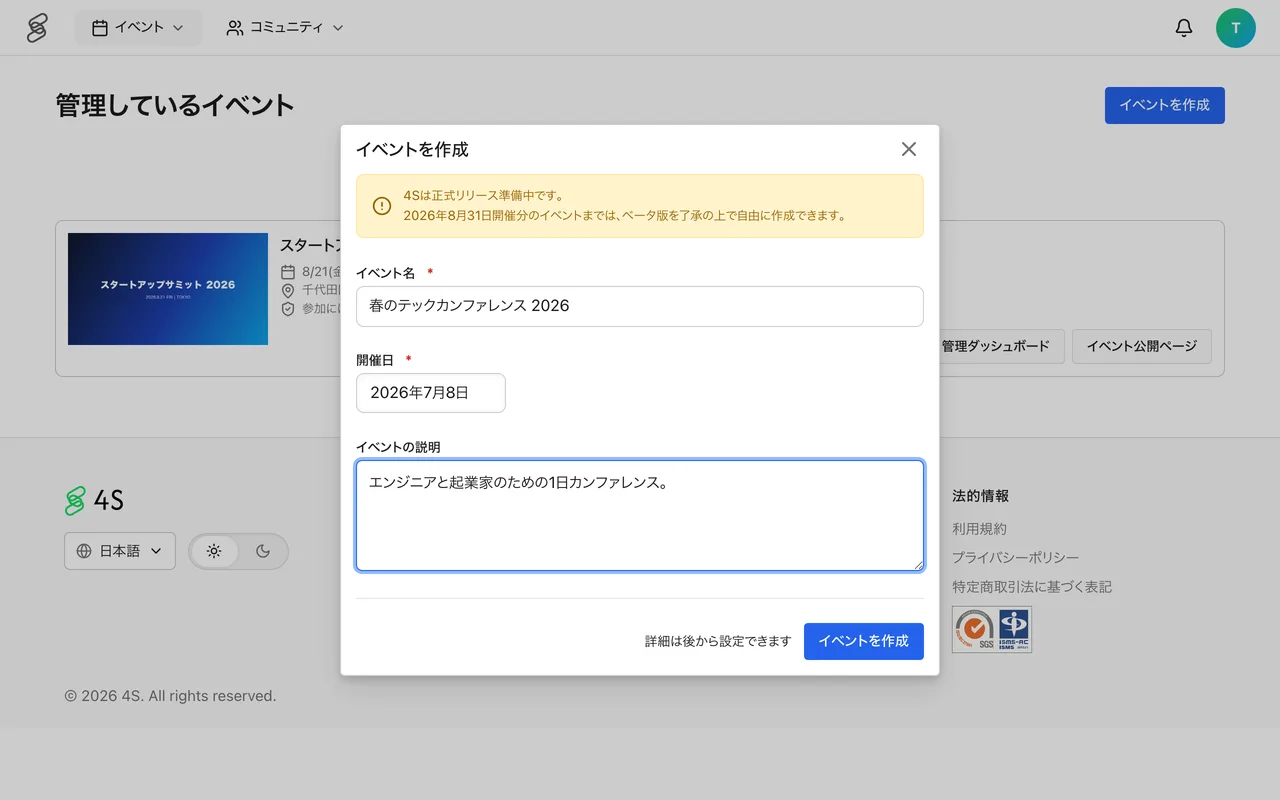
Steps to create
- Select "Create Event" from the management menu.
- In the create dialog, enter the event name (required), event date (required), and description (optional).
- Select "Create Event" to create a draft event. Details such as format, venue, and main image can be configured later.
Configuring after creation
Fill in the rest from each menu in the management screen.
- Settings — set basic details such as format (onsite, online, or hybrid), venue, date, and main image.
- Page Design — set the main image and page colors.
- Tickets — set up entry types (free/paid, capacity).
How to publish
Once everything is ready, change the status in Settings to publish. The status can be Draft, Published, or Limited Access. Setting it to "Published" and saving makes the event viewable and open for registration.
Things to check before publishing
- Title and description — the first things people see in search results and social shares. Make it clear who the event is for.
- Main image — shown at the top of the page and on event cards in listings.
- Tickets — confirm free/paid settings and capacity.
- Event URL — the URL right after creation is an auto-generated string. Change it to a readable one from "Custom URL" in feature settings.
You can edit the event after publishing, but for changes that affect participants, such as date or venue, be sure to notify registered attendees as well.