
Creating ticket types
You can set up multiple ticket types per event. Splitting tickets by attendance type or payment method makes sales easier to track.
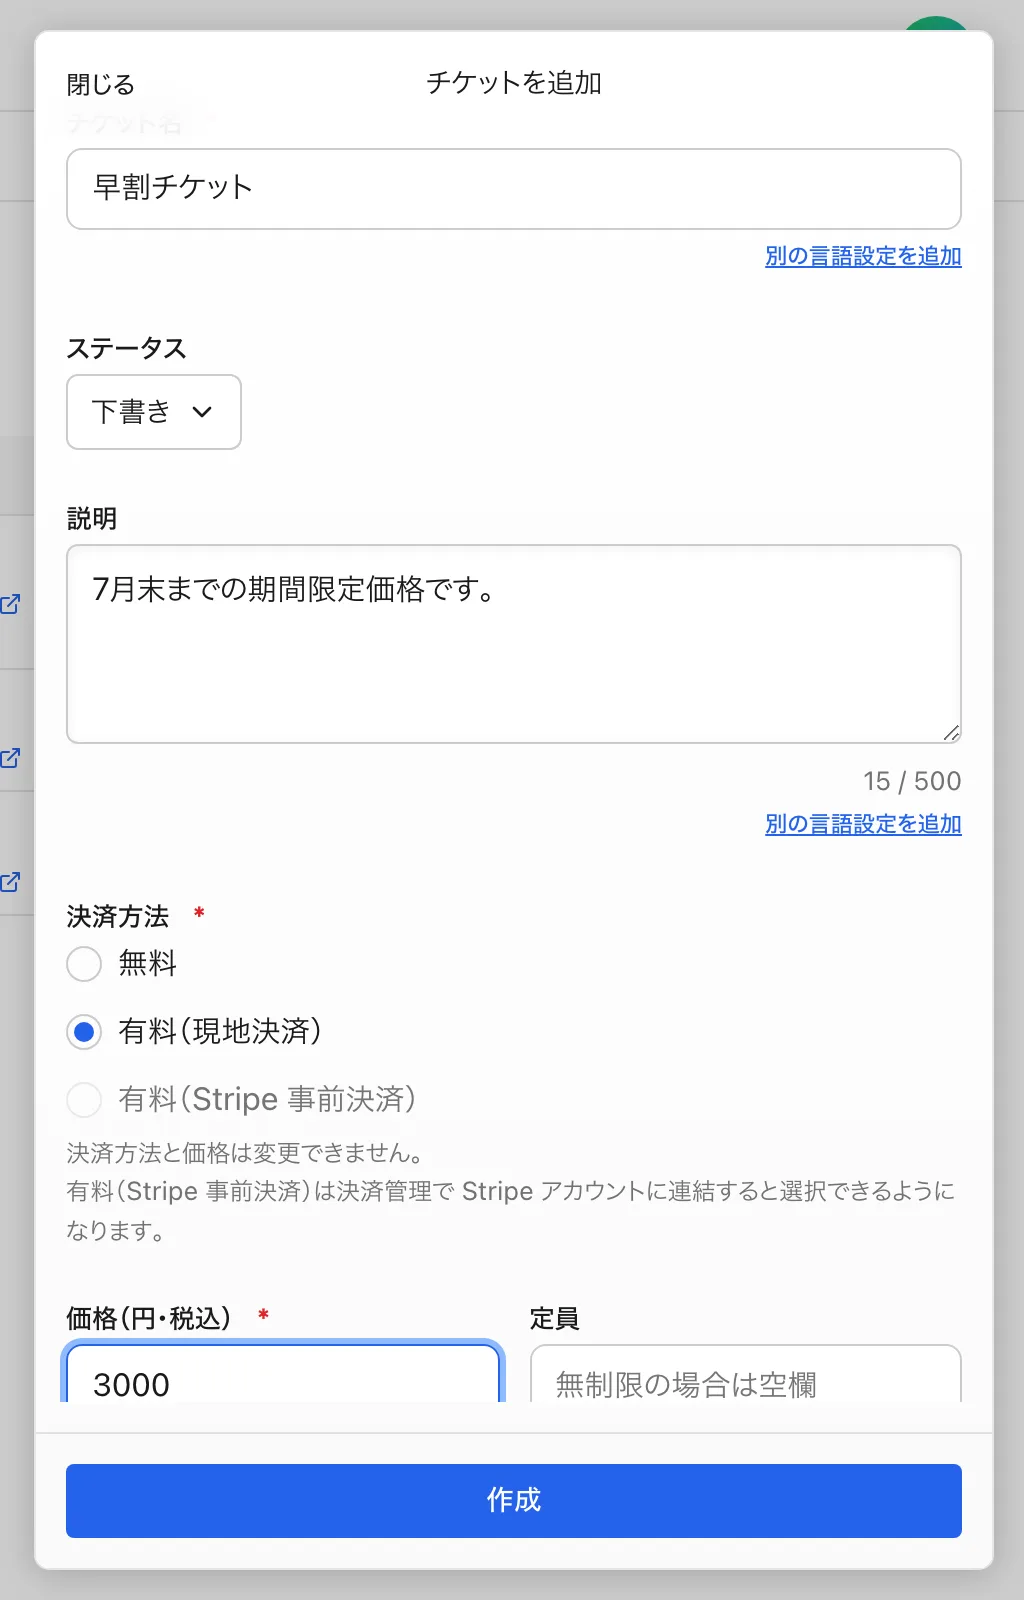
What you can configure
- Name and description — use names that identify the audience, such as "General", "Student", or "VIP".
- Payment method — choose from Free, Paid (On-site Payment), or Paid (Stripe prepaid). Prepaid becomes selectable once you link a Stripe account in payment management.
- Price — set the amount for paid tickets.
- Capacity — the maximum number of tickets. Leave blank for unlimited.
- Status — Draft / Published / Private. Draft tickets cannot be purchased. Private tickets are not shown on the event page but can be purchased by anyone with the URL. Start and stop sales by switching between Draft and Published.
- Approval required — when on, anyone registering with this ticket needs organizer approval.
- Transfer permission — available only for prepaid tickets.
- Referral settings — a mechanism that lets attendees invite people they trust. The organizer sets the conditions, such as the target ticket and discount. Referral settings can be configured when creating a ticket or later from the edit screen.
The payment method and price cannot be changed after the ticket is created. To change the amount, create a new ticket type and switch to it.
Design tips
- Early bird — to drive early registrations, prepare a time-limited discounted ticket and start or stop its sale by switching between Published and Draft.
- Hybrid events — separate tickets for in-person and online attendance smooth out day-of operations.