
Setting up and using label printing
When you check attendees in, you can print a label with their name, title, and QR code on a Brother label printer. Use it as a name badge or entry pass. Even if printing fails, the attendee stays checked in.
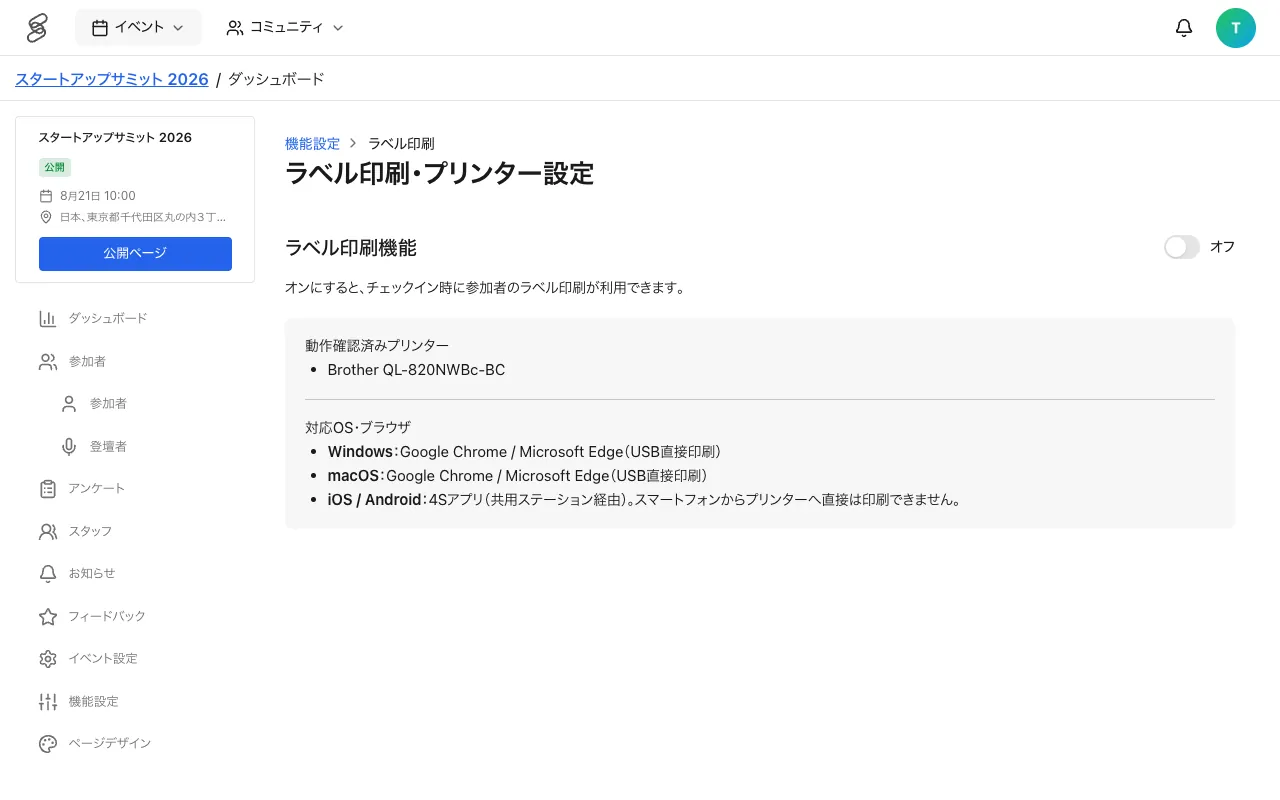
Supported printers and environments
- Verified printers — Brother QL-820NWBc-BC
- Windows and macOS — print directly to a USB-connected printer from Google Chrome or Microsoft Edge.
- iOS and Android — print through a "Shared station" from the 4S app. Smartphones cannot print directly to the printer.
Every device needs an internet connection.
Ways to print
- Print from this device — connect the printer to a reception PC by USB and print from that PC. Suited to a fixed reception counter.
- Shared station — turn the PC connected to the printer into a "Shared station", and other PCs and smartphones print through it. Use this when checking in with smartphones or when you want labels to come out in one place.
Preparation (admins)
- In the event management screen, open "Label printing" from "Event Features" and turn on "Label printing feature". Turning the feature on or off and registering printers require the ADMIN role.
- On the PC connected to the printer, press "Register USB printer", choose the device shown, and allow the connection.
- Enter the display name, printer serial number, media, and label length, then save. Match the media setting to the media actually loaded in the printer.
- Use "Test print" to check that the text fits and to check the QR code, margins, and cut position.
Four media types are supported: 62 mm continuous tape, 29 mm continuous tape, 29 × 90 mm die-cut labels, and 62 × 100 mm die-cut labels. For continuous tape, the label length can be set between 30 and 300 mm. Long names may not fit on short labels, so check with content close to your real attendees.
Using a shared station
- On the PC connected to the printer, open the label printing settings and press "Use this device as a shared station" for that printer. It is ready when "Shared receiving active" appears.
- On the PCs and smartphones used for reception, open the same event and choose the shared station as the destination.
- During reception, keep the settings screen in front on the shared station PC and disable sleep. Receiving stops if the screen is hidden.
If the shared station PC stops responding for about 30 seconds, it is treated as offline and can no longer be chosen as a destination. Print jobs not run within 2 minutes expire, so old labels will not suddenly print after recovery.
On the day
- Reception staff choose a destination under "Label printing" on the check-in screen: "Print from this device", "Shared station", or "Do not print". The destination is saved per device.
- When you check an attendee in, the label prints from the chosen destination.
- To print again, use "Print label" in the actions column of the attendee list, check the preview, and print.
The label shows the attendee's name and title, and a QR code with the same content as their My QR code. For speakers, the name and title registered for the speaker take priority.
If you see "Unknown — inspect the printer"
This means 4S could not tell whether the label printed, for example because the USB cable was unplugged or the connection dropped during printing. The label may already have come out, so it is not reprinted automatically.
- Make sure the printer is not running.
- Check whether a label came out.
- In "Print history & review" on the label printing settings screen, press "Confirm printed" or "Confirm not printed".
- Print again only if it was not printed.
While an unknown result remains, further printing to the same printer is paused.
Common issues and how to handle them
- Media or cover errors — follow the message on screen and check that media is loaded, the cover is closed, and the loaded media matches the media setting.
- USB communication errors — check the printer's power and USB connection, close other printing software, and reconnect. On Windows, the PC used for printing needs the WinUSB setting for the printer's USB interface.
- The shared station does not appear as a destination — check that the settings screen is open on the shared station PC and shows "Shared receiving active".